Thursday, January 28, 2016

Our Great Room Bookcase Project ...

Happy Thursday, friends!

I wanted to share a little bit more about a project we did in our great room before Christmas ....

For several years (whether in this house or our last), we've had this buffet under our TV.  While it worked really well in the niche in our last home, I just felt like it was a bit lost on the wall in this house.

In an effort to fill up the wall a bit better, we wanted to add custom built bookcases, but they would've cost more than we wanted to spend on this project.  That's when we turned to Plan B.

BEFORE:  


And AFTER!  Thank you, IKEA ... once again, its selection and affordable prices helped us bring our vision to fruition!


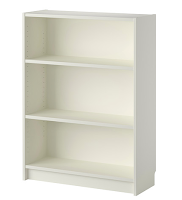
We purchased four of their Billy bookcases (2 tall and 2 short), along with two of their extenders.  We also purchased doors to go on the bottom half of the tall ones and to cover the entire bookcase on the shorter ones (photos from IKEA.com): 
While we love the look of the Billy bookcases just as they are once you put them together, we decided to "beef them up" a little bit to give them more of a custom look.


We did that by adding crown molding to the top (thanks to our neighbor, Colt, for cutting our molding for us), along with picture lights (IKEA).  I then added lattice molding to the fronts and frames of the shelves so that they appeared a bit thicker.  I then finished them off by adding black knobs to the cabinet doors in place of the white ones that came with them.


You "know" I enjoy having more shelves to play with where I can add little goodies such as ceramic horse bookends ... pretty faux greenery ...


or cute arrow art and metal orbs.


I just had to have this cute wire basket (TJMaxx) ... hoping I can find one more just like it!


At night, the picture lights help illuminate that side of the room, which used to be a bit dark.


On the weekend evenings, when not with friends or watching sports in the "man cave," you can find us right here.


One more time ... 


And, AFTER!  


The new bookcases join the two other projects we did in here ... beefing up the fireplace and adding a new chandie.  Oh how I like affordable home improvement!

As always, thanks so much for stopping by,

post signature

Tuesday, January 19, 2016

Our Winter Mantel

Happy Tuesday, friends!

Well, according to our forecast, we might ... just might ... be getting our first real snowfall this weekend!  So, I think it's only fitting that I share our Winter mantel.  


After all, it's dedicated to snow!


There's something about snow in the forecast that gets me excited! 


I guess it's the anticipation of it ... the frenzy at the grocery store ... putting a warm meal on your menu ... and waiting for the snowflakes to start falling!


Yes, the uncomfortable snow pants and boots are ready to go ...


and our sleds, discs and inter tubes are ready to fly down snow-covered neighborhood hills!


Let's not forget a good ol' snowball fight and building a snowman.  And, after we're all just about frostbitten, we'll come back inside and plop ourselves right here by the fire for awhile ... only to go back outside and do it all over again!


**Fingers crossed** that snow is on the way! 

As always, thanks so much for stopping by,

post signature

Monday, January 11, 2016

A Little Foyer Project

Happy Monday, friends!

New Year ... new projects, which brings me to our foyer, with which I have a love/hate relationship!  

Don't get me wrong ... I love the soaring ceilings, and the light that pours in all day!  BUT, I don't always love the decorating challenge it presents, especially because of the "dead space" up above.  See it up there (photo from Hour Homes before we moved in):


One day, we'll have picture frame moulding added way up there, but, for now, it remains empty.


It's that challenge that encouraged me to do *some*thing to draw your eye away from the "blankness."  And, that's when I turned my attention the back wall of our foyer.  Here it is right before I got busy:


And, here is the AFTER!  Yay, stripes!


I knew I wanted an odd number of stripes so that the darker color (Ben Moore's Bennington Gray) would be at both the top and the bottom (to contrast with the white ceiling and baseboard).


I measured the height of our wall ... divided by the number of stripes I wanted (7) ... and then got busy marking and taping away.


I then painted every other 11.5" stripe Ben Moore's White Dove ...


Before the second coat dried, I peeled the Frog tape away ... and prayed for clean lines the entire time!  ha!


That was a nail biter, for sure, but I really like the end result.  Noooow, when you walk in our home, your eye is instantly drawn to the back wall and not the empty 2nd story walls!

One more time ... before:


And, NOW! **grin**

I'm in the process of creating a small picture gallery to replace the French print I temporarily added ... baby steps, right?


Admittedly, I was really nervous to tackle this project because I can't draw, much less mark or tape, a straight line to save my life, BUT I was determined (so, please just don't look "too" closely).  If you've wanted to do something similar, but a bit too intimidated to tackle it ... don't be ... you'll love the end result!

Thanks for stopping by!
post signature